
Understanding What Passive House Certification Actually Means
So, you’ve probably heard the term ‘Passive House’ floating around, often mentioned alongside ‘eco-friendly’ or ‘super-efficient’ homes. But what does getting passive house certification actually mean for a building project? It’s far more than a simple green sticker on the window; it’s a demanding, third-party quality guarantee that your building performs to an exceptionally high standard. Think of it less as a marketing buzzword and more as a promise of brilliant comfort, long-term durability, and rock-bottom running costs.
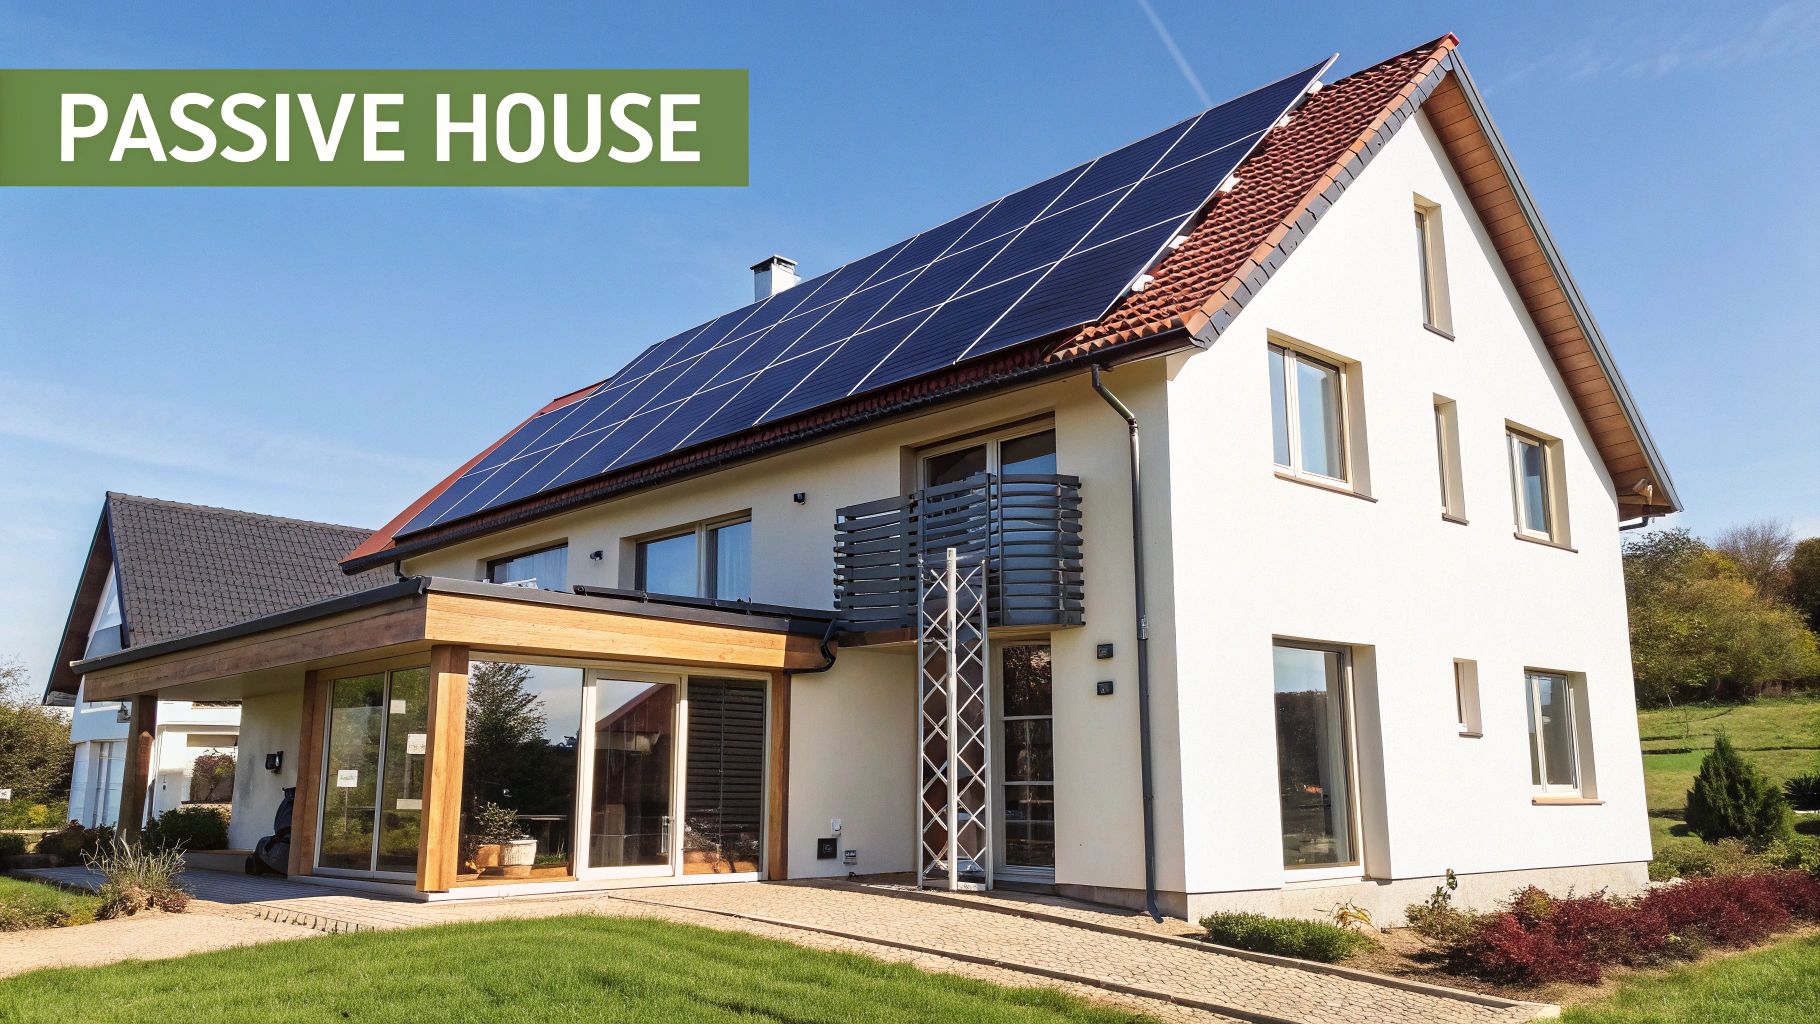
At its core, the certification confirms that a building has nailed the five core principles of the Passivhaus standard. This includes exceptional thermal insulation, high-performance windows, a design free of thermal bridges, a superior airtight envelope, and a mechanical ventilation system that recovers heat. This isn't just about good intentions on paper. It's about constructing a building so well that it naturally stays at a comfortable temperature all year round with very little energy needed. In real terms, this means your heating and cooling systems barely have to switch on, which leads to huge savings on your energy bills and a much smaller carbon footprint.
More Than Just Energy Savings
While the impressive energy savings are a huge plus, the true value of passive house certification is found in the complete package of benefits it brings. It’s a genuine commitment to the health and well-being of the people inside. The continuous, filtered fresh air supplied by the ventilation system creates a much healthier indoor space, free from pollen, pollution, and the dampness that can cause mould. The steady internal temperature, with no draughts or cold spots, offers a level of comfort that most standard buildings just can't deliver. For a developer, this means a premium, more desirable asset. For a homeowner, it means a healthier, more enjoyable place to live.
This focus on real, measurable performance is gaining serious momentum across the UK. The adoption of Passivhaus is accelerating quickly, growing from just over 1,500 certified homes in 2023 to more than 2,250 by early 2025. What's more, there are another 8,000 projects in the pipeline aiming for certification. This isn't some niche trend; it shows a fundamental shift in how we think about building quality. You can explore the data on this impressive growth and see its impact on the UK construction industry.
A Quality Seal You Can Trust
Ultimately, passive house certification is an investment in certainty. With typical construction, the final performance can be a bit of a lottery. With Passivhaus, the standard demands meticulous design, precise on-site work, and thorough testing. Every single detail, from how a window is fitted to the design of a doorstep, is analysed to stop heat loss and air leaks. This forces an incredible level of attention to detail, making sure the building performs exactly as it was designed to.
To put the difference into perspective, let's look at how a certified Passive House stacks up against a standard new-build in the UK.
| Performance Metric | Passive House Standard | Standard UK Building | Improvement Factor |
|---|---|---|---|
| Space Heating Demand | <15 kWh/m² per year | ~120 kWh/m² per year | Up to 90% reduction |
| Airtightness Level | <0.6 ACH @ 50 Pa | ~5.0 ACH @ 50 Pa | Over 8x tighter |
| Overall Energy Use | <60 kWh/m² per year | Varies widely, often >200 | ~70% reduction |
| Thermal Comfort | Consistent, draught-free | Prone to cold spots/draughts | Significantly higher |
As the table shows, the performance gap is huge. This strict framework means you get exactly what you paid for: a building that is not only incredibly energy-efficient but also exceptionally comfortable, healthy, and truly built to last.
Meeting Technical Requirements Without Overspending
The strict technical specifications for passive house certification can feel a bit daunting, particularly when you’re trying to keep a firm grip on the budget. But hitting these high-performance targets doesn’t have to break the bank. With clever design and a practical mindset, you can meet the requirements for heating demand, energy use, and airtightness without costs spiralling. It’s all about putting your money where it will make the biggest difference and sidestepping the common pitfall of over-engineering.

Airtightness: The Non-Negotiable Foundation
Let’s talk about airtightness first, because it’s arguably the most critical and least flexible standard. Your building must achieve a result of 0.6 air changes per hour (ACH) or less during a pressurised blower door test. There’s simply no leeway here; you either pass, or you fail. The secret to hitting this number affordably is designing a simple, continuous airtight layer right from the start.
Instead of splashing out on expensive, specialist products for every surface, your focus should be on meticulous detailing and execution. For instance, a basic membrane that is perfectly sealed and taped at every junction, window, and service penetration is far more effective than a complicated design full of potential gaps. Many successful projects achieve this by:
- Simplifying the building's form: Complex shapes mean more junctions, and more junctions mean more potential air leaks. A simpler building envelope is easier and cheaper to make airtight.
- Using wet plaster: When detailed correctly, a continuous skim of wet plaster on masonry can serve as a durable and cost-effective airtight layer.
- Prioritising quality control: Regular checks on-site and clear communication with the construction team are essential. A single tiny, unsealed gap can cause a failed test, leading to expensive remedial work. Think of it as spending a little more on supervision to save a lot more on rework down the line.
Insulation and Thermal Bridges: A Balancing Act
Hitting a space heating demand below 15 kWh/m² per year is all about super-insulation and getting rid of thermal bridges. This is where you can be really strategic with your spending. While it’s tempting to specify the priciest insulation on the market, the real objective is to achieve the required U-values in the most economical way possible.
For example, you might use a high-performance but more expensive rigid foam insulation where space is tight, like in a warm roof. But for a standard cavity wall, a thicker layer of more affordable mineral wool could deliver the same performance for less money. It’s about being smart with your choices, not just throwing money at the problem.
Eliminating thermal bridges—those weak spots in the building's thermal envelope where heat escapes—is crucial. This is less about buying expensive components and more about intelligent design. Simple, well-considered details for junctions between walls, floors, roofs, and windows are paramount. A common oversight is the connection for a balcony or how a window is installed, both of which can create significant thermal weak points. A thermally broken component might have an upfront cost, but it prevents the need for much more expensive fixes later on.
Smart Material Choices and System Design
Your choice of windows and doors plays a massive role. Triple-glazed, thermally broken units are essential, but they are not all created equal. You need to scrutinise the specifications of the frames, not just the glass. A high-performance glazing unit set in a poorly designed frame will still leak heat. Compare certified components and choose the one that gives you the best balance of performance and price for your specific project. Don't be swayed by marketing; always look at the certified data.
This strategic approach is becoming more common as building standards improve. Government data shows that for new homes in England and Wales from January to March 2025, 86% achieved an energy efficiency rating of A or B. This reflects a wider industry shift towards higher performance, where the principles of passive house certification are influencing mainstream building practices. You can explore the full government report on building energy performance to see the trends for yourself.
Ultimately, meeting the technical requirements is a puzzle of smart design, meticulous on-site execution, and strategic spending. It proves that a certified Passive House can be both exceptionally high-performing and financially sensible.
Building Your Certification Team The Right Way
Embarking on a passive house certification isn't just a building project; it's a firm commitment to a specific performance target. You wouldn't ask a general mechanic to work on a high-performance race car, and the same logic applies here. You need a specialised team that truly understands the Passivhaus standard. Putting together the right group of professionals from day one is one of the most critical decisions you'll make, directly shaping your budget, timeline, and whether you achieve certification at all.
The first step is knowing who to trust and understanding the different certification paths. The Passive House Institute (PHI) provides the classic certification for new buildings. For refurbishment projects, the equivalent standard is EnerPHit, which is specifically designed to handle the challenges of existing structures. This distinction is crucial. An expert in new-build Passivhaus projects may not be the ideal choice for an older building aiming for EnerPHit, which often means dealing with existing structural quirks and conservation rules.
Finding Qualified Professionals
Your core team should always include a Certified Passive House Designer or Consultant and, if possible, a Certified Passive House Tradesperson. These certifications aren't just for show; they represent serious training and a proven grasp of the standard's detailed requirements. Use these credentials as your starting point when checking out potential team members, but don't forget that practical experience is equally important.
Here’s what to look for in a genuinely qualified professional:
- A strong portfolio: Always ask to see their completed, certified projects. A consultant who has successfully taken multiple projects through the certification process has priceless, real-world experience.
- Deep PHPP knowledge: The Passive House Planning Package (PHPP) is the energy modelling software used to design and verify the project. Your designer must be completely at home with it and able to explain how a design choice affects the energy model.
- Clear communication: They should be able to break down complex ideas like thermal bridging and airtightness strategies into simple terms you can follow, without hiding behind industry jargon.
A major red flag is any professional who seems dismissive of the standard's strictness or suggests that "near enough" is good enough. In the world of Passivhaus, precision is non-negotiable. Another warning sign is a poor attitude towards collaboration. Your architect, builder, and certifier need to work as one unified team, not as separate entities.
When to Bring Your Team Onboard
The short answer is: as early as you possibly can. Your Passive House Consultant should be involved from the very beginning, before a single line has been drawn on a plan. Bringing them in later is a common mistake that almost always leads to expensive redesigns. For example, an architect might design a stunning building with complex joints that create massive thermal bridges—a problem a consultant would have flagged instantly.
Your consultant’s main job is to guide the design team, using the PHPP to test ideas and ensure every decision keeps you on track for certification. They are the quality control lead, reviewing drawings, advising on materials, and planning the essential on-site testing. This should be a collaborative relationship, with the consultant acting as a supportive guide, not just a box-ticker. A good partnership ensures your architectural vision and the performance standards can live together, resulting in a building that’s both beautiful and incredibly efficient. This integrated approach is the secret behind nearly every successful Passivhaus certification.
Navigating Design Decisions That Make Or Break Certification
The design phase is where your dream of achieving passive house certification starts to take shape. The choices you make here are the bedrock of the entire project. Get them right, and you're set for a smooth construction process. Get them wrong, and you'll be constantly firefighting, dealing with budget blowouts and the genuine risk of failing to get certified. It all starts with the energy model.
Mastering the Passive House Planning Package (PHPP)
Think of the Passive House Planning Package (PHPP) as the command centre for your project. It's a highly detailed spreadsheet that simulates your building's energy performance. Your designer will use this to test every single choice, from the thickness of your insulation to the exact type of windows you specify. This isn't just a tool for checking things at the end; it's an active partner throughout the design process.
A common slip-up is treating the PHPP like a simple box-ticking exercise. This often leads to using generic data, which can throw the whole project off course. For example, using standard U-values for windows instead of the manufacturer's certified data can create a performance gap. You might only discover this mistake when it's far too late and incredibly expensive to put right.
Here's a glimpse of the PHPP interface, showing how every component is meticulously tracked and analysed.
This level of detail shows that every element, no matter how small, is factored into the energy balance calculation, leaving no room for guesswork.
Seasoned designers use the PHPP proactively. They run multiple scenarios to find the perfect balance between performance, cost, and architectural style. For instance, they might compare the cost-effectiveness of adding more wall insulation versus upgrading to pricier windows to hit the heating demand target. This back-and-forth process is what separates a successful project from a stressful one.
Critical Design Choices with the Biggest Impact
While the PHPP looks at everything, some design decisions have a much bigger influence than others. It's vital to get these sorted from the very beginning.
-
Building Orientation and Form: The sun is your most powerful and free resource. By orienting the building to maximise solar gain in winter through south-facing windows (in the Northern Hemisphere), you can dramatically cut your heating needs. Likewise, a simple, compact shape minimises the external surface area, meaning there's less space for heat to escape. A complex, sprawling design is an uphill struggle from day one.
-
Window and Door Selection: This is a classic stumbling block. It’s not enough to just pick triple-glazed units; the performance of the frame is just as important. A thermally broken frame stops the frame itself from acting like a mini-radiator, leaking precious heat outside. Another detail that's often missed is the threshold. A standard metal threshold creates a major thermal bridge. Successful designs use thermally broken thresholds or recess them into the floor to maintain a continuous thermal envelope.
-
Thermal Bridge Elimination: A thermal bridge is any part of the building's structure that lets heat bypass the insulation. Imagine a steel beam running through an insulated wall or a concrete balcony connected directly to the internal floor slab. These weak spots must be designed out from the start. This isn't about fancy gadgets; it's about careful detailing at every junction. For example, instead of a continuous concrete balcony, a thermally isolated, bolt-on structure would be used. These details have to be drawn, understood by the team, and followed precisely on-site.
Juggling these technical requirements with your architectural vision can feel like a tightrope walk. But a skilled designer sees them not as limits, but as parameters for creative problem-solving. True success in passive house certification comes from this blend of beautiful design and brilliant, uncompromising performance.
Managing Construction Quality and Testing Like a Pro
Once your designs are finalised, the spotlight shifts to the construction site. This is where the theoretical brilliance of your plans meets the hands-on reality of building a high-performance home. Achieving Passive House certification requires a level of construction precision that goes far beyond a standard building project. It’s less about speed and more about finesse; every taped seam and sealed joint is a critical move toward your goal.
Successful projects don't leave this to chance. They depend on rigorous quality control from day one, with clear and constant communication between the design team and the contractors on site. To keep everything on track and meet all the technical standards, you need a solid system for tracking project progress effectively. This organised approach helps avoid the small but expensive mistakes that can compromise the airtight envelope and threaten the entire certification.
The Airtightness Test: Your Moment of Truth
For any Passive House team, the most nail-biting experience is often the day of the blower door test. This is a non-negotiable assessment that measures whether your building meets the strict airtightness target of 0.6 air changes per hour (ACH) at 50 Pascals of pressure. If you fail, it’s back to the drawing board to hunt for leaks and carry out remedial work, a process that costs both time and money.
Preparation is absolutely key. Before the official test, the entire construction team should do a detailed visual check, focusing on common failure points:
- Window and Door Seals: Are all the seals installed correctly and free from damage? Have any temporary packers been removed?
- Service Penetrations: Has every single pipe, wire, and duct passing through the airtight layer been sealed perfectly with the right grommets or tapes?
- Junctions and Corners: Are the connections between walls, floors, and the roof completely sealed? These junctions are notorious weak spots for air leakage.
If a test does fail, the leak hunt begins. A smoke pencil becomes a builder’s best friend here, as its fine stream of smoke is visibly drawn towards any gaps in the building envelope. Common culprits often include unsealed gaps around electrical boxes, poorly fitted loft hatches, or even tiny cracks beneath door thresholds. Finding and fixing these leaks requires patience and a methodical approach, but it’s an essential part of the learning curve for any team new to Passive House building.
This infographic shows the key stages a project goes through, from the initial design modelling to the final on-site tests.
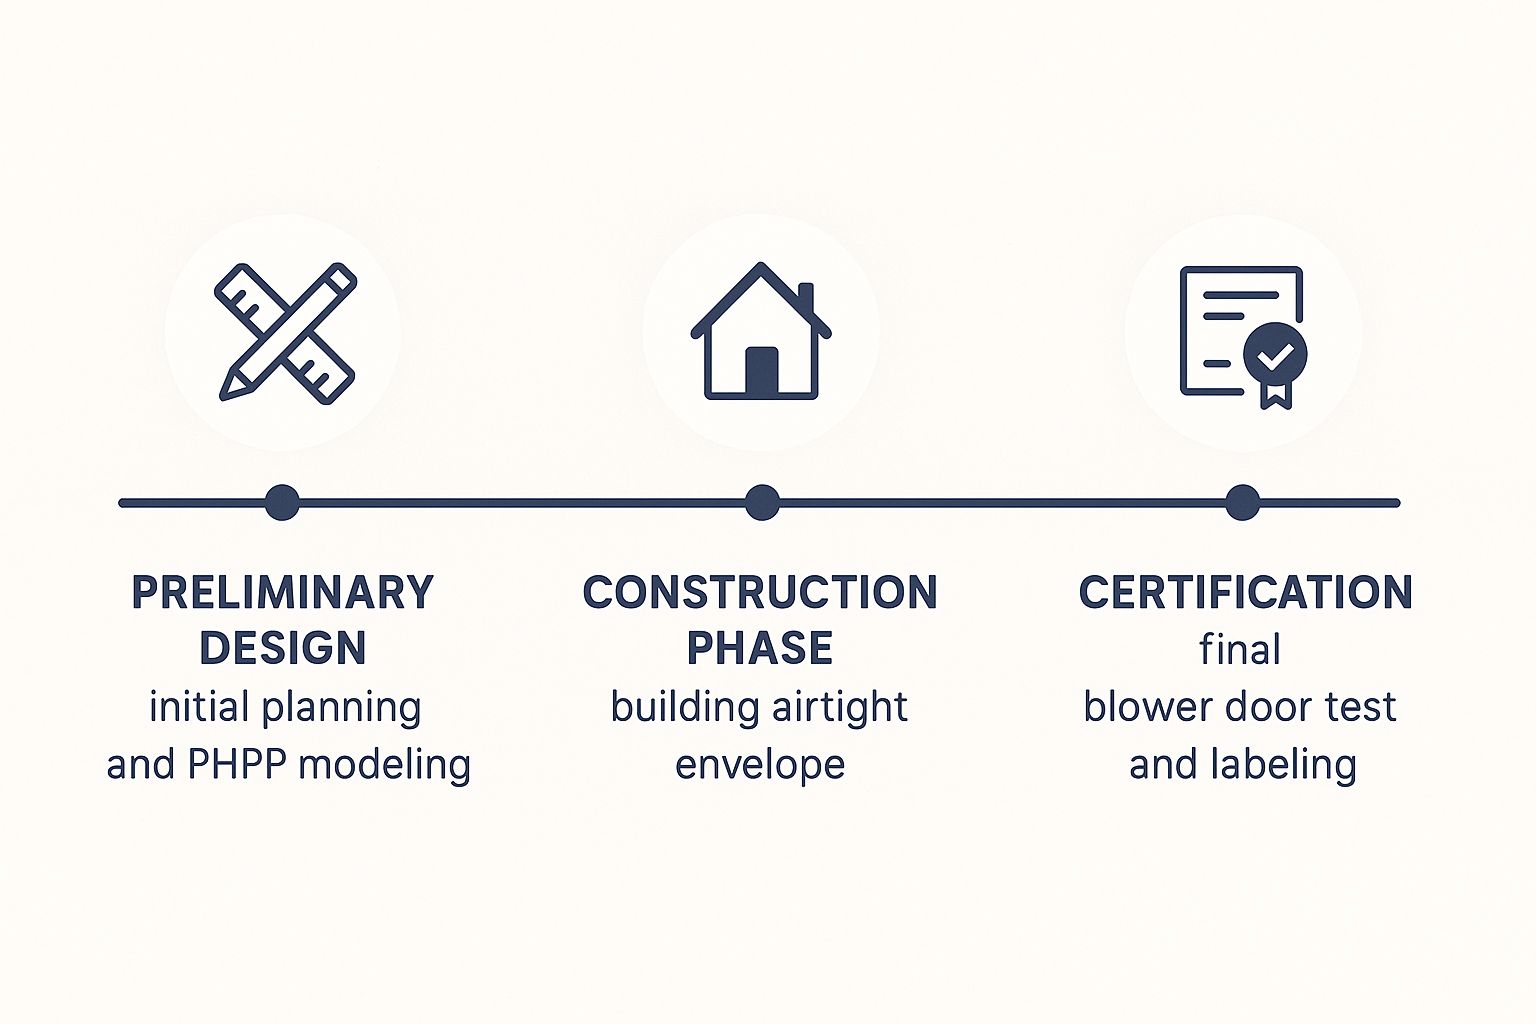
As the timeline highlights, construction quality and testing aren't just things you do at the end. They are woven into the entire process, forming the bridge between a great design and a certified building.
On-Site Quality Control That Actually Works
Beyond the final blower door test, it’s the continuous, day-to-day quality control that truly guarantees success. To help you structure this, here’s a typical schedule of the tests, inspections, and documentation needed throughout the build.
| Construction Phase | Required Tests | Documentation Needed | Typical Costs |
|---|---|---|---|
| Foundation & Ground Floor | Insulation continuity check | Photographic evidence of insulation layers and DPC junctions, delivery notes for materials. | £150 – £300 (Certifier site visit) |
| Wall & Roof Structure | Pre-plasterboard airtightness check (interim blower door test) | Photos of all airtightness tapes, membranes, and seals at junctions and penetrations. | £300 – £500 (Blower door test) |
| First Fix & Services | Inspection of service penetrations (MVHR, plumbing, electrics) | Detailed photos of all sealed grommets and collars before they are covered. MVHR ductwork pressure test results. | Included in Certifier visits |
| Pre-Handover | Final Blower Door Test, MVHR Commissioning & Balancing | Official airtightness test certificate, MVHR commissioning report with measured flow rates for all rooms. | £400 – £700 (Final tests & reports) |
This table shows that testing isn't a single event but a series of checkpoints. By planning for these inspections and documenting everything meticulously, you build a robust case for certification and minimise last-minute surprises.
Experienced contractors often use a "toolbox talk" approach, holding regular on-site meetings to discuss specific airtightness or insulation details before the work starts. This ensures everyone understands not just what they are doing, but why it's so vital for the building’s final performance.
Photographic documentation is another powerful tool. Taking detailed photos of every key junction and sealed penetration before it’s covered creates an essential quality record for the certifier. This not only proves the work was done correctly but also serves as a fantastic learning resource for future projects. Commissioning the mechanical ventilation and heat recovery (MVHR) system is another crucial step. It’s not just about flicking a switch; it involves professionally balancing the system to ensure it delivers the correct, calculated airflow to each room—a task for a specialist.
By embedding these quality checks into the daily workflow, teams can build with confidence, turning the demanding requirements of Passive House certification into a manageable and repeatable process.
Real Costs, Timelines, And Challenges You'll Actually Face
Let’s be honest: pursuing passive house certification is a serious commitment of time, money, and focus. While the long-term energy savings are fantastic, it’s vital to have a clear-eyed view of the upfront investment and the common hurdles you'll face. Pretending it's a simple, inexpensive add-on is the quickest way to derail a project. Let's look at what the journey really costs.
Breaking Down the Certification Budget
The "Passivhaus premium"—the extra cost over a standard build—is a hot topic. While figures vary, most projects in the UK see an uplift of between 4% and 10% on total construction costs. This isn't just one single fee; it's a collection of expenses spread across the project's life.
A typical breakdown of these additional costs for a single home might look something like this:
| Cost Component | Typical Range (for a single dwelling) | What It Covers |
|---|---|---|
| Design & Consultancy Fees | £3,000 – £8,000+ | Specialist input from a Certified Passive House Designer, PHPP energy modelling, and thermal bridge analysis. |
| High-Performance Components | Varies widely | This is your biggest variable. It includes triple-glazed windows, MVHR systems, and specialised tapes/membranes. |
| On-Site Testing & QA | £1,000 – £2,500 | Multiple blower door tests (interim and final), MVHR commissioning, and certifier site inspections. |
| Certification Body Fees | £1,500 – £2,500 | The official fee paid to the certification body for reviewing all documentation and issuing the final certificate. |
For a self-builder, this might mean an extra £20,000 on a £250,000 build. For a larger social housing development, the premium per unit often decreases due to economies of scale. Crucially, this premium is an investment, not just a cost. It pays you back through dramatically lower running costs and a higher-quality, more resilient building.
Realistic Project Timelines
Time is another critical resource. A common mistake is underestimating how much extra time the design and verification process adds. From the initial concept to receiving your official certificate, a typical timeline for a new-build Passivhaus project can be 18 to 24 months, and sometimes longer for complex builds.
This extended timeline is largely due to the meticulous front-loading of the design process. The detailed PHPP modelling, thermal bridge analysis, and component specification all happen before a single shovel hits the ground. This intensive design phase might add 2-4 months to your pre-construction schedule compared to a standard project. However, the payoff is a smoother, more predictable construction phase with fewer costly on-site changes.
Common Challenges and How to Solve Them
The path to passive house certification is rarely a straight line. One of the biggest challenges is simply the steep learning curve for teams new to the standard. Miscommunication between the architect, builder, and specialist trades is a frequent source of problems, often leading to mistakes in the airtight layer.
Solution: Hold "toolbox talks" on-site before starting critical tasks like taping membranes or installing windows. Ensure everyone understands why a detail is so important, not just what they need to do. This shared understanding is vital.
Another common hurdle is material procurement. The high-performance components needed—like specific window frames or MVHR units—can have long lead times. If you don't order them well in advance, you risk significant project delays. This issue is becoming less pronounced as the standard gains popularity. The growth is undeniable, as the UK now has over 2,250 certified Passivhaus homes, with another 8,000 in the pipeline. You can see the latest Passivhaus UK statistics to appreciate how the supply chain is adapting to this demand. Still, smart planning remains essential.
Your Certification Success Action Plan
Turning detailed plans into a fully certified Passive House isn't just about hitting technical targets. It's a marathon that requires a practical roadmap, smart decisions, and consistent momentum. This action plan is built from real-world project experiences, giving you a clear guide to help you move through each phase with confidence.
Immediate Next Steps: Where to Begin
No matter where you are in your project, there are valuable actions you can take right now.
- Just Starting Out? Your first job is research. Go beyond the glossy photos in case studies and really dig into the design choices and construction details. The idea is to fully grasp the commitment involved before you spend a single pound on design fees.
- In the Design Phase? This is the time to get laser-focused on thermal bridge analysis. It’s a common stumbling block. You need to challenge your design team on every junction detail. Remember, a simple, well-thought-out detail is always a better bet than a complex one that's a nightmare to build correctly on site.
- Nearing Construction? Your attention must pivot to communication and quality control. Get a pre-construction workshop on the books with your contractor and the key tradespeople. You need to personally walk them through the critical airtightness and insulation details. Make sure they understand why such precision is vital for passive house certification.
Setting Realistic Milestones and Measuring Success
Vague goals are the enemy of a successful project. Getting your passive house certification means setting clear, measurable milestones that go far beyond just passing the final airtightness test.
| Project Phase | Key Milestone | What Success Looks Like |
|---|---|---|
| Concept Design | PHPP Model Feasibility | Your Passive House consultant gives the thumbs-up, confirming the basic design can meet the standard without blowing the budget. |
| Detailed Design | Thermal Bridge Free | All major junctions are designed, analysed, and confirmed to have psi-values below the required limit. |
| Pre-Construction | Watertight Supply Chain | Critical long-lead items like certified windows and the MVHR unit are on order with firm delivery dates. |
| Mid-Construction | Interim Airtightness Pass | A preliminary blower door test (done before the plasterboard goes up) hits a result close to the final target, like <1.0 ACH. |
Catching problems early is everything. For instance, if that interim airtightness test reveals major leaks, it’s a massive red flag. It tells you site supervision needs to be much tighter. Even a seemingly minor change, like a different flooring type, should trigger an immediate review of the design. As experts often point out, a change meant to improve thermal performance could accidentally mess up accessibility compliance—another vital part of modern building design.
Leveraging Your Certification for Long-Term Value
Getting the certificate isn't the finish line; it’s the starting pistol. Once your building is officially certified, it's time to shout about its superior quality. You need to market its proven benefits: incredibly low energy bills, excellent indoor air quality, and unmatched thermal comfort. These aren't just features; they are powerful selling points that make your property stand out. A certified Passive House is a premium asset, and by positioning it that way, you can ensure you get the full return on your investment.
If you’re ready to turn your sustainable building vision into a high-performance reality, the expert team at Lùths Services is here to guide you. We specialise in delivering certified low-carbon projects with proven results. Discover how we can support your project at Luths Services.